Express Mode
1. Download Atlasware.
2. Install the program. You may receive a warning from Microsoft that the publisher is unknown and making you confirm that you want to download and install. A folder named Atlasware will be created in the All Programs directory. Go ahead and put it on as many computers as you like.
3. Run the program. You can do this by either:
- leaving the checkbox selected at the conclusion of the installation, or…
- clicking on Start > All Programs > Atlasware > Atlasware 2.0
4. This is the first screen you will see. Click “Register new user and company”.
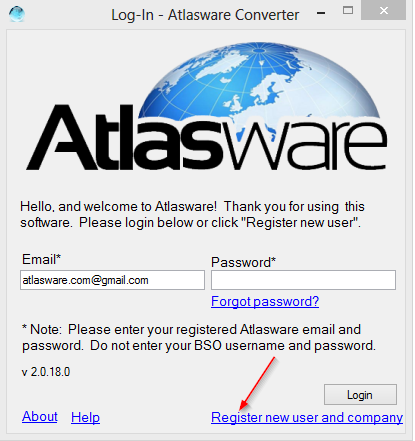
5. This will launch the Atlasware New User Wizard. Follow the prompts entering your contact information. You select your login information. (Note: this is NOT the login information for the BSO.) It is your email and any password you like. Once you successfully register, you will receive an email at the address you provided. Click on the hyperlink and your account will be confirmed.
6. Your email should automatically be inserted in the login screen of Atlasware Converter, simply type in your password and click “Login”.
7. You will see the following screen:
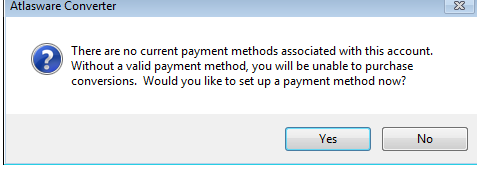
Since you want to take Atlasware for a testdrive, click “NO”
8. There are two modes: Manual (just like the old Atlasware) and Automated (The one that orders and convertsyour file for you). You may still get encrypted disks which is why we kept the functionality to manually convert. For a tutorial on Manual mode click HERE.
To experience the full power of 2.0, click “Automated Mode”.

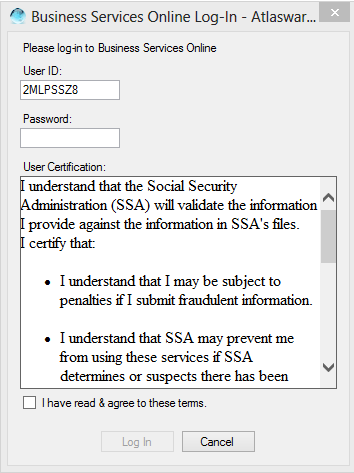
9. The next screen will log you into the Social Security BSO website. This screen just overlays it. When you type in your user ID and password, you are actually typing into the BSO website fields. We don’t store either your user ID or password. Once you have filled out the fields, click the “I have read” box and then the login button.
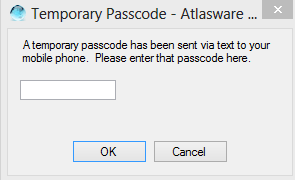
10. However you get your texts, copy them in here. Again, this is the BSO website field with our overlay. After copying the passcode, click OK.
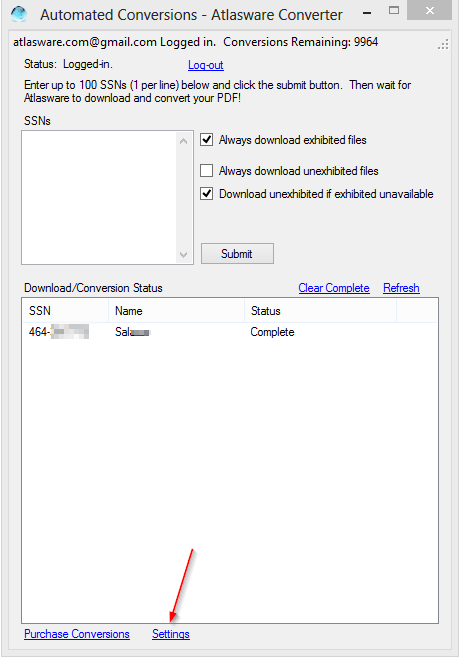
11. This is the next screen you will see. Notice the following:
- Status in the upper left hand corner
- The ability to “log-out”
- The big blank screen where you can manually enter or paste in up to 100 social security numbers. (Note: SSNs can be entered either xxx-xx-xxxx or xxxxxxxxx.)
- The option to download both the Exhibited and/or Unexhibited files.
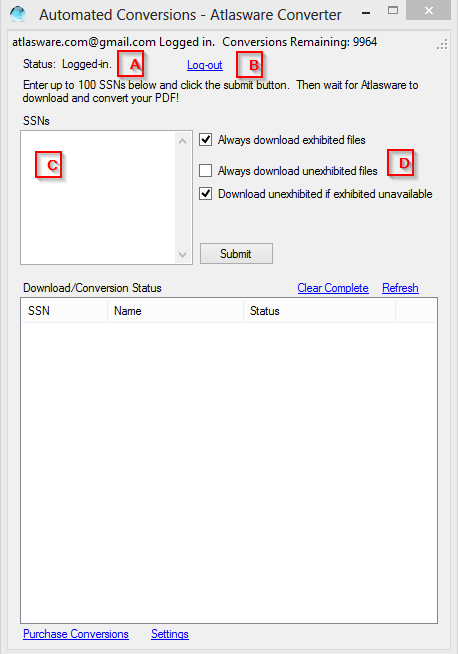
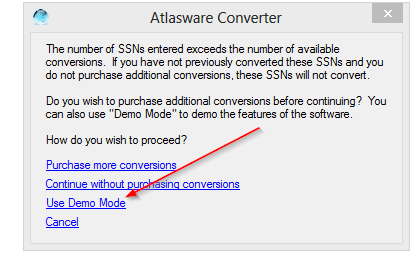
Go ahead and enter some SSNs and click “Submit”. If you were a paying customer, you would be done. The program will automatically request up to 100 SSNs, wait for them to be ready, download them and convert them to our proprietary PDF format. No more requesting one at a time, no more waiting for the email from SSA saying the file is ready for download, no more having to log back in to get the file, no more having to manually convert the Zip file to our PDF. Everything will be done in the background. Atlasware will keep the connection to SSA open until all files are downloaded and converted. If you happend to lose connection, no worries, Atlasware will get the files the next time you log into Automated Mode.Since you are just trying us out, you will see this warning. Select “Use Demo Mode”
Since you are just trying us out, you will see this warning. Select “Use Demo Mode”
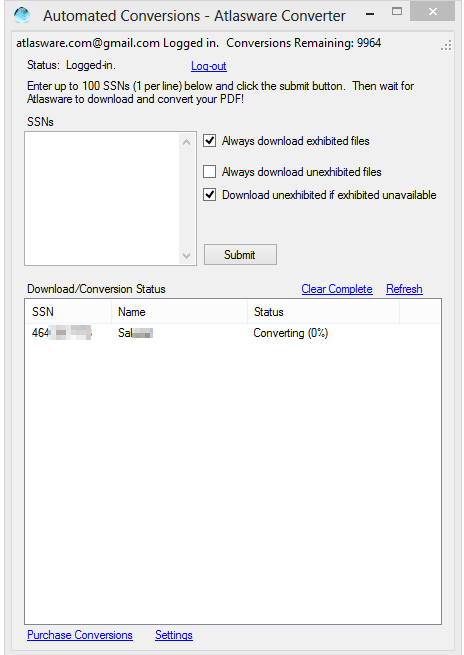
12. Atlasware will automatically request the files, wait for the download (Figure A.),download them (Figure B.), and convert them to the single PDF Atlasware has always produced (Figure C.).
Figure A:

Figure B:

Figure C:
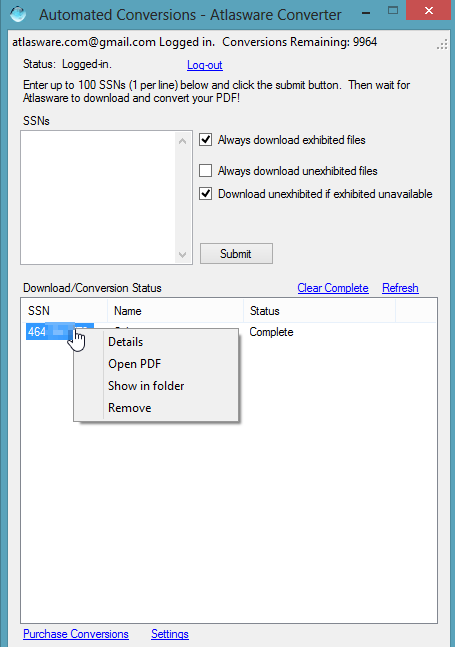
13. Once the files are successfully converted, you can access your converted files directly from the Status Menu. Simply right click any completed file and you will be able to open the PDF directly or if you want to view or move several, click Open Folder and you will be taken to the default folder in Windows Explorer.
Submission Errors- If you accidentally enter an incorrect SSN, Social Security will send you the following error: “SSN Submission Error”. Be careful, because too many incorrect submissions will lock you out of the BSO website and you will have to call them to get back in.
14. Changing Default Settings- What if you don’t like all of the preset options Atlasware 2.0 installs with? You can change most settings very easily and quickly. You can access the “Settings” portion of our program to find out. A hyper link is generally located on the bottom left of most screens.
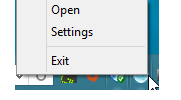
Or you can right click our icon in your system tray (bottom right of your computer screen) and select “Settings”:
Either way, thisis what you will see:
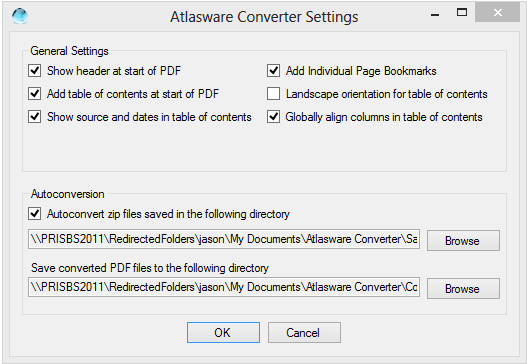
The general settings allow you to customize the PDF documents you convert. Each setting is set out below.
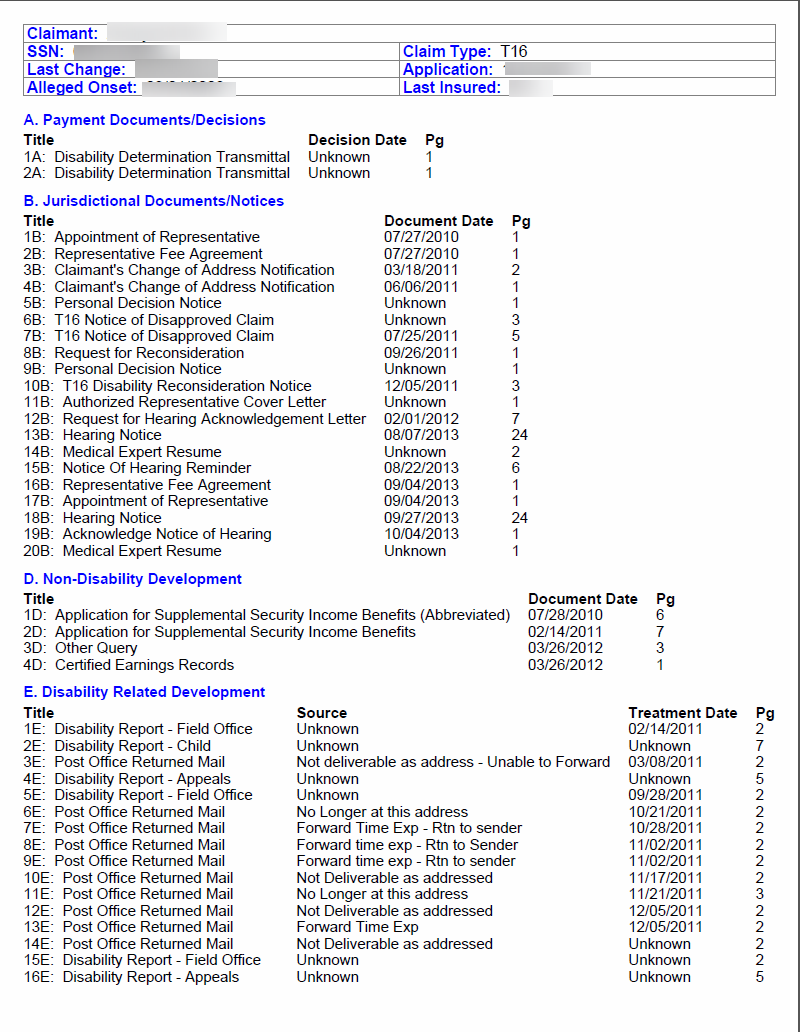
Show header at start of PDF- is selected by default and it provides the header on the Table of Contents.

Add Table of Contents at Start of PDF– This is also selected by default and you would be crazy to deselect it. It provides hyperlinked access to all of the exhibits. This allows you to jump directly to the exhibits and with our “back to top” feature at the bottom of every page, jumping back and forth from exhibits to the Table of Contents is instantaneous.
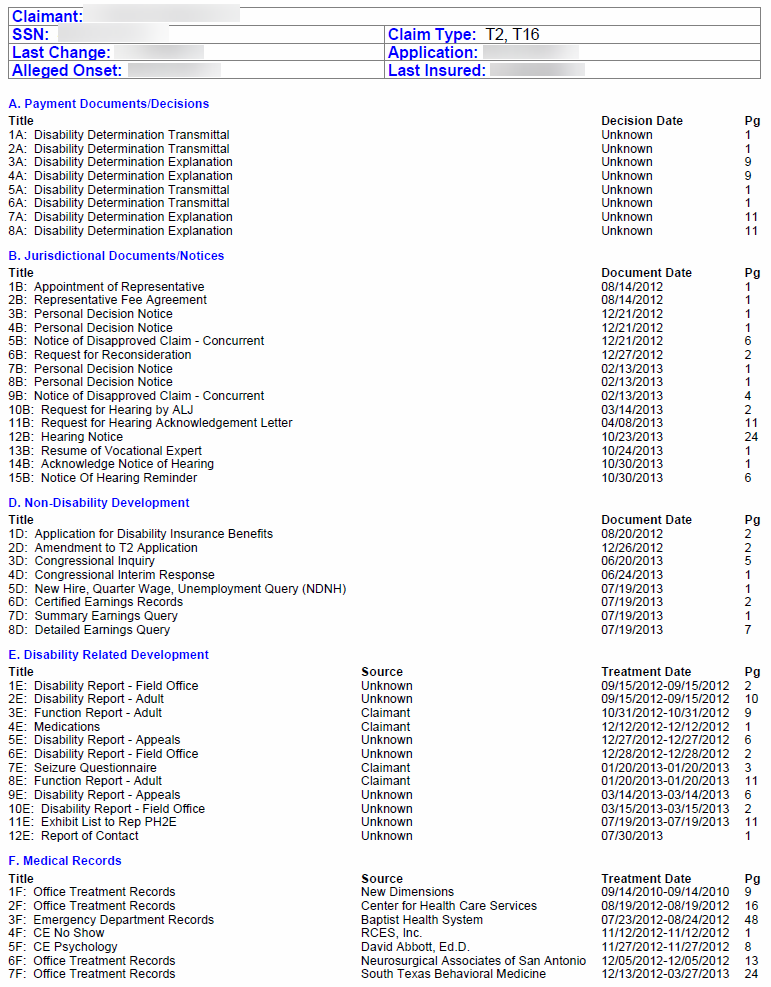
Show source and dates in table of contents– This is a new feature that captures more data from SSA’s index file. You can see this in the picture above. This is helpful to for you to evaluate the most recent and relivant medical records, quickly see if your client is actively treating or if your staff is updating the current medical records.
Add Individual Page Bookmarks– This too is selected by default. Every single page will have it’s own bookmark.
Landscape orientation for table of contents– Now that you have the option to add the Source and Date in the Table of Contents, at times it can get a little crowded. In those cases, you might want the ability to view the Table of Contents in Landscape mode. Note if you select this option and print the Table of Contents, it will print in Landscape Mode as well. No need for a picture here…pretty self explanatory.
Globally align columns in table of contents– There was a battle over this one, but globally aligned won out in the end. If you are Type A like me, you will probaly like the fact that the data is contained in fixed columns rather than depending on the number of letters in the preceding column. There will be a bunch of white space in between fields and the text may shrink to fit if the exhibit name is particularily long, which also bothers my Type A, but this is 100% your personal preference.
Globally Aligned:

Free Form:
Autoconversion- Back in the Beta days of Atlasware 2.0, occasionaly the Automated Mode wouldn’t be functional, so we created a “monitored” folder. You would still have to manually download the Zip files, but if you downloaded them to this folder, they would automatically convert. We will probably keep this functionality in case SSA does something that breaks Automated Mode. Still saves a couple steps.
PDF Location- I promised I would tell you where to find your file. By default it is save to My Documents\Atlasware Converter\Converted PDF Files. You can change this to any directory you choose or even your desktop. Just click “Browse” and select the folder you want. All converted PDF will automatically be saved in the chosen directory.
15. From here on out, Atlasware can be launched simply by double clicking the icon your system tray in the lower right hand of your screen or double clicking the icon on your desktop.
16. You will continue to see the Not Converted in Demo Mode (image below) until you purchase vouchers. Hopefully this Demo Mode is enough to show you that a single $2 to $3 per client, unlimited computers, unlimited conversions will more than pay for itself. If you are in the habit of billing for case expenses, add a conversion fee to your fee agreement. Enjoy and please send feedback to: support@atlasware.com
